Bench Test: A 2026 Beginner’s Route Into Astro Boy Model Kits
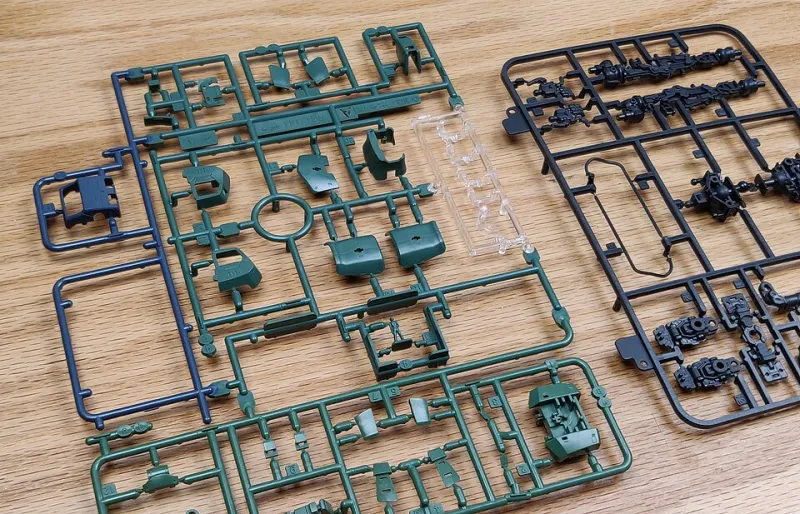
Photo: Gravis, CC BY-SA 4.0, via Wikimedia Commons
Astro Boy is a deceptively friendly first model kit. The character is mostly rounded shapes, bright boots, and clean lines, so the box art promises a weekend of easy assembly. Then you open the bag, find a gate mark running down a forearm, and realize the glossy plastic is going to document every slip of the hobby knife. That is not a reason to back away. It is a reason to buy the right kit and set up a bench that forgives a beginner.
This is a collector’s guide, not a race to the finish. The goal is a model you are happy to leave on the shelf in 2026, not a cautionary tale about what happens when you rush a snap-fit joint with a pair of household scissors.
Start With the Bench, Not the Box
You do not need an airbrush, a spray booth, or a dedicated workshop to build a good Astro Boy kit. You need light, a cutting mat, and a few tools that cost less than a single import shipping charge. A pair of hobby nippers, a sharp hobby knife, sanding sticks in a couple of grits, tweezers, and some toothpicks will carry you through most snap-fit builds. Add a gloss clear coat later if you decide to deal with decals.
Safety is part of the hobby, not a disclaimer tucked in the back of the manual. Cut away from your fingers, keep a small dust brush handy, and work in a ventilated room if you use primer or solvent-based clear coats. A cheap respirator is worth more than a fancy display stand when you are sanding resin or spraying lacquer. If your only work surface is the kitchen table, use a tray that can be moved before dinner.
Snap-Fit Reissues Are Your Friend, With Caveats
Snap-fit kits are the obvious entry point. They do not require cement, and the better ones are engineered so the joints disappear into the character’s silhouette. The catch is that snap-fit does not always mean beginner-proof. Older molds can have tight pins, flash around the edges, and instructions that assume you have built a dozen kits before. Trim before you force. A pin that needs a firm push is fine; a pin that needs a prayer is not.
This is also where the reissue question matters. A worthwhile reissue usually brings something to the bench: refreshed decals, cleaner moldings, color-separated parts, or a clearer build manual. A nostalgia-tax shelfwarmer often brings a new box, a glossy promotional photo, and the same aging tooling from decades ago. Compare the parts layout and build photos before you pay a premium. If the only upgrade is the packaging, let it sit.
Check Scale by the Ruler, Not the Number
Model scale can be useful, but it can also be noise. A 1/12 figure is roughly six inches tall, which fits comfortably on a bookshelf. A 1/6 piece is a display-centerpiece commitment. Resin busts and garage kits can be smaller in number but larger in presence, especially once a base is involved. Before ordering, look for the finished height in inches or centimeters. That tells you more about shelf fit than a fraction ever will.
US buyers should also factor in shipping and customs. A kit that looks affordable from a Japanese retailer can climb quickly once international shipping is added. Check whether the seller packs the box securely, whether replacement parts are realistic, and whether the return policy exists at all. For a first build, a domestic hobby shop or a specialty retailer with clear stateside stock is often worth a few extra dollars.
Molding Quality: Look at the Curves
Astro Boy’s design is unforgiving. Smooth limbs and glossy surfaces show seam lines, scratches, and sanding marks. When you inspect a kit, look at the gate placement. Gates on flat areas are easy to clean up; gates on curved forearms or boot edges take more patience. Sharp panel lines are good. Soft, blurry details are a warning sign. So is plastic that feels brittle or has a greasy sheen before you have even touched it.
Garage resin imports are a different sport. They can offer poses and details that mass-market kits never will, but they often arrive with pour stubs, mold release, pinholes, and parts that need pinning. Resin dust is not something to treat casually. Wet-sand it, wear a mask, and keep the cleanup contained. If you have never built a styrene kit, a garage resin Astro Boy is not the place to learn. Start with plastic, then graduate.
Decals, Stickers, and the Gloss Coat Truce
Decals are where many beginner builds go from promising to smudged. Water-slide decals need a glossy surface to sit on, a setting solution to snug down, and a clear coat afterward to protect them. Stickers are more forgiving, but they can silver around edges and look thick under shelf lighting. Neither option is wrong. They just ask for different expectations.
Test old decals on a scrap piece before committing them to the chest or face. Yellowing and cracking are common in kits that have sat in a warehouse. Work slowly with tweezers and a damp cotton swab. If a decal folds over on itself, do not panic and stab at it with the knife. Lift it back into water and try again. A little patience here saves a lot of repainting later.
Painting Pitfalls That Catch First-Timers
The biggest painting mistake is treating every part like a separate canvas. Moving joints, pegs, and snap-fit connections need masking or careful handling. Paint in thin layers. Thick primer fills detail and turns clean edges into soft ones. Keep the character’s palette simple, and do not chase a perfect box-art finish on your first attempt. A clean build with a modest topcoat often looks better than a heavy paint job fighting the plastic underneath.
If you use spray cans, test on a plastic spoon before you aim at the kit. Humidity and cold weather affect the finish, which matters if you are building in a garage in November. Acrylics are friendlier for brush work. Solvent-based clears are tougher but less forgiving. Whatever you choose, follow the label and give each coat time to cure. Rushing the clear coat is how dust becomes a permanent design feature.
Display Safety Is Part of the Build
Astro Boy kits are meant to be seen, but sunlight, heat, and dust are not kind to them. Keep finished models out of direct sun and away from radiators, windowsills, and any spot where a pet can test gravity. A simple acrylic case or a closed shelf reduces dust without hiding the kit. For a heavier resin piece, use a stable base and museum putty to keep it from sliding.
Do not store built kits in a hot attic or a damp basement and expect them to survive a move. Glossy plastic can warp, decals can lift, and resin can become brittle over time. If you are displaying a kit near a doorway or a high-traffic shelf, secure it. A fall from shelf height is a much faster way to destroy a model than any painting mistake.
The Reissue Litmus Test
Before you buy any Astro Boy kit in 2026, ask three questions. Is the tooling actually improved, or is the box just louder? Are the decals and instructions current enough to help a first-time builder? Does the price match the experience, or are you paying a premium for nostalgia alone? If the answers are vague, wait. The hobby is full of good kits, and the right one will still be there after you have checked the parts photos.
Start small. Build clean. Learn how the plastic behaves before you chase a showpiece. A beginner’s Astro Boy kit does not need to be perfect. It needs to teach you why the next one will be better.